


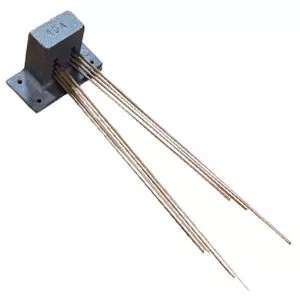
Grandfather Triple Chime Clock Chime Block 12 Rod
$140.00
Grandfather Triple Chime Clock Chime Block 12 Rod
Grandfather Triple Chime Clock Chime Block 12 Rod. This fits many of the post 1950 German made floor clocks. It mounts to the back of the clock case with the screws that come with the block.
$140.00
SKU: GO1C-B12-27
Categories: All Products, All Clock Parts, Mechanical Clock Chime Rods
Ships From: USA
Sold By: Clockworks Inc.
Returns: 30-day return policy
Secure Payment: Shop with confidence
Mechanical clock chime rods for post 1950 mechanical clocks. Offering the chime block complete with the rods. Clockworks
Please view these information tabs to learn about our Mechanical Clock Chimeblock and Rods
Why We Offer Only the Complete Chime-Block
We now only offer the complete clock chime-block and rods. The rods are a press fit into the chime-block by machines and it is difficult to get a single rod out. Other times there are threads that go into the block but have such a secure tight fit, you cannot remove them.
Trying to do so would result in more rods breaking. Also there are various threads on the rods that are the replacements and it can create much confusion. It is for these reasons that we now offer the complete clock chime-block and rods.
Overall, it is a tricky thing to get the correct thread size for the individual rod in a chime-block and rod set and have it fit perfect. Not to mention, when the chime-block rod is not the correct size, often enough it gets sent back. Then we get into the situation of trying to swap it out over and over.
Moreover, all of it eventually ends up being a return for a complete chime-block and rods set. So, in the long run it is best to just get a new chime block and rod set from the beginning. That will save a lot of time and frustration.
Chime-Block and Rods Volume
The volume of the clock chime is not alterable by means of the chime-block and rods or the hammer adjustment.
These parts have nothing to do with making the clock louder or softer. The only thing that can make the clock louder or quieter is to move the clock case.
If the clock is on a hard wood surface it will be louder. A rug will be quieter. The proximity to the wall can also alter the sound. It has nothing to do with the chime-block and rods.
Clock Chime Block Styles
The first step in purchasing a new chime block is to determine the chime block style that is in the clock.
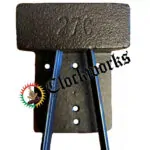
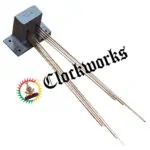
The Styles are side, bottom and back strike.
Figure out which style you need. Then, count how many rods are in the chime block. Measure through the chime block to get the length of the longest rod.
Correspondingly, find this information on the drop down list for the correct chime block and rods.
Bottom Strike Style A
Chime block style A For bottom strike and side strike units.
Side Strike Style B
Chime block style B For side strike units. Occasionally, you can also use this for back strike diagonal Westminster units.
Back Strike Style C
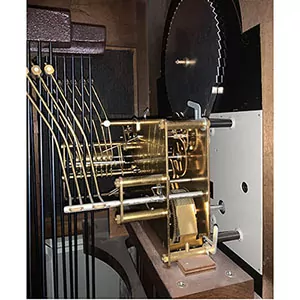
Chime block style C is for floor clock models (and some wall clocks) with two rows of hammers on the back of the clock movement.
Chime sound in Clock Chime Block Styles
No matter which Clock Chime Block Style you need, there has to be some adjustments made. If the clock chime does not have a clear, crisp tone, do not panic. It could just be a matter of adjusting the hammers on the rods.
The hammer heads are on wires which are meant to be bent. Do this with your fingers, while the hammer head is down.
Just bend the wire that the hammer head is on, one at a time. Keep the hammer head about 1/8” from the rod when it’s at rest. In other words, in the up position. Bend one at a time.
Then, lift and drop it to see if there is a nice crisp tone. Subsequently, do this right down the line with each hammer on whatever chime block style. Make sure each one has a nice tone. In the long run, the chime will sound perfect.
Why Does Chime Hammer Positioning Need to Occur
Mechanical clock chime hammer positioning is easy to do. It only involves bending the hammer head wires. Upon the initial installation, this was done by the clock maker as well.
When replacing a clock movement you need to bend the chime hammers to the chime rods. This is why the hammer heads are on bendable wires.
They are meant to be bent into the perfect position. It is not uncommon to bend them an inch this way or that way. The clock movement will not have the hammers in the perfect spot to make the correct sound when hitting the rods. This is why chime hammer positioning is so important.
Clock Chime Hammer Positioning
A mechanical clock movement has hammers that need to be bent into their final position. The correct clock-chime hammer position needs the tops of the hammer heads to be about 1/4 inch down from the chime block.
The hammers need to be 1/8 inch away from the rod. This would be when it is at rest. In other words, bend the hammer wires so the head is 1/8 away from the chime rod. This spacing between the head and the rod is so it will not thud or double strike.
Tuning the Mechanical Clock Chime
Repeat this process for each wire, one hammer at a time, down the line. Continue in this manner until you can lift and drop the hammer to create a crisp sound. If each hammer head is done this way the clock will have a nice song in the end.
Often a customer will say the sound is not correct. This is due to improper hammer positioning. When performing the above directions correctly the sound is beautiful.
Positioning the 340 / 341 Series
The 340 and 341 Hermle clock movement series went through a change in the hammer wires. The hammer heads were on wires, but now they are made on flat bars. The positioning is still the same, however it is a little more difficult to bend them.
The hammer head is on the skinny end of the bar. The bar gets wider as it goes back toward the roll pin.
With needle nose pliers, bend this bar where it goes from skinny to wide. The overall assembly will be slightly higher from the chime block. That is, if you are swapping out the movement with the older style wire hammer head rod.
It is an option to raise the entire chimeblock with a shim to help with this. It is not an absolute requirement. Bending the hammer arms are usually sufficient.
 For a clean crisp chime sound
 Adjust the hammer wires
 Should be about 1/8 away at rest
 Sometimes they are bent to the extreme
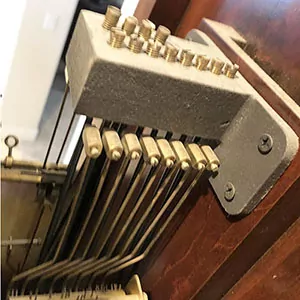
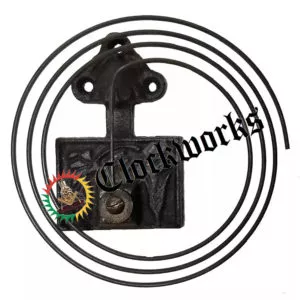
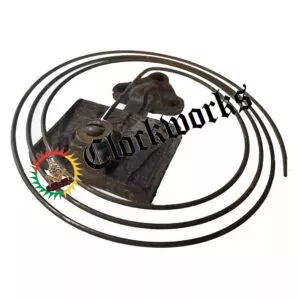
Chime Block
This block measures 26 inches long and has 12 rods. Moreover, this fits many of the post 1950 German made floor clocks. In addition, it mounts to the back of the clock case with the screws that come with the block.
So order the chimeblock by measuring the length of the longest rod from the tip all the way through the block.
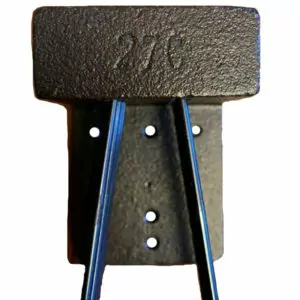
Mounting the Chime Block
Furthermore, the chime block comes with four bolts to screw it in place, along with 4 washers. So there needs to be four holes through the back board in order to mount it in the air on the back side of the clock.
Usually this back board attaches to, or near, the back panel of the clock case. Of course, when replacing a chime block, the holes may not match up to your old configuration. So you may need to drill new holes for the new chime block.
| Weight | 3 lbs |
|---|---|
| Rods |
8 rods 12 inch ,8 rods 22 inch ,8 rods 27 inch ,12 rods 25 inch |
Related Articles
You may also like…
Floor Clock Westminster 8 Rod Chime Block

I have a Gaza Family wall clock made in West Germany with a 12-rod slanted chime block. The longest rod is about 18 inches. One rod is broken. Any idea where I could get a replacement chime block?
Can I see a pic of the chime block please
James Stoudenmire
30yr Clockmaker
Author of Clockworks.com
I wasn’t sure how to get pic in this reply so I sent it in a response to the email I got. The clock is a Gazo Family “Coronado” which I understand to have been a California clockmaker but the works are stamped “Made in Germany”.
Please email this same question with pics to clockworks@clockworks.com
James Stoudenmire
30yr Clockmaker
Author of Clockworks.com
I need a chime for an Erhardt Jauch Uhrenfabrik Emperor grandfather clock. It two sets of numbers: 771273 on the left, and 238436 on the right. Bolt holes are 70mm by 60mm. Thanks.
Is this westminster chime 4/4 or triple chime 4/8 ?
James Stoudenmire
30yr Clockmaker
Author of Clockworks.com
I am looking for a Chime Block for Howard Miller GF Clock 610-948 serial # MF001310090 Thanks
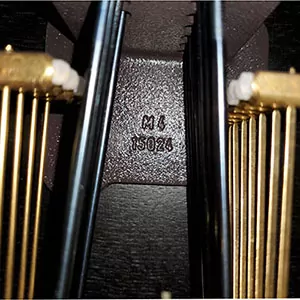
What are the numbers off of the back plate of the clock movement itself? If it is hard to get to, usually you can stick a cell phone up behind the movement and get a picture of the numbers. Or through the side access panel if there is one.
James Stoudenmire
30yr Clockmaker
Author of Clockworks.com
Hi James.
MSU11
116 cm
354 517
Thanks so much
That would be this chime block with 12 hammers
https://www.clockworks.com/product/grandfather-clock-chime-block-with-hardware
James Stoudenmire
30yr Clockmaker
Author of Clockworks.com
Thanks James,
I am also in need of an ornate Pendulum for the same clock, it was bent when the clock was moved.
Please order a lyre style pendulum for a Kieninger 116cm clock movement from the link below.
The bob diameter would need to be selected, This is the round disk at the bottom of the pendulum.
https://www.clockworks.com/product/kieninger-lyre-clock-pendulum
The bob diameter needs 2 inches on each side to swing back and forth, so the inside case width would need to be wider than this. So if the case is 12 inches wide on the inside, the maximum bob diameter would be 6 1/2 inches wide for example.
James Stoudenmire
30yr Clockmaker
Author of Clockworks.com
Where should the chime block be located to achieve optimum sound quality?
See this link|
https://www.clockworks.com/posts/clock-chime-hammer-positioning
James Stoudenmire
30yr Clockmaker
Author of Clockworks.com
About 1/4 down from the block, and 1/8 inch away from each rod
James Stoudenmire
30yr Clockmaker
Author of Clockworks.com
I have a Dold Exquisite Grandfather clock that I purchased in 1998. It has a block with a 12 chime rod set the longest being 26 L All the rods were broken off in a move. Do you have a replacement a replacement block and does it come in Copper/brass?
This link
https://www.clockworks.com/product/grandfather-clock-chime-block-with-hardware
Only comes in black rods these days, they sound fine however
James Stoudenmire
30yr Clockmaker
Author of Clockworks.com
Do you ship to APO AE 09096-0023
Yes indeed. Please put the product and the shipping address in an email, and we will custom quote shipping and provide a check out link
James Stoudenmire
30yr Clockmaker
Author of Clockworks.com
I have a Howard Miller grandfather clock Model 610-440. It has a 12 chime block marked B122/12. 4 of the rods are broken so I am looking to replace the whole chime block and am wondering which block to order. Thanks
This chime block =
https://www.clockworks.com/product/grandfather-clock-chime-block-with-hardware
James Stoudenmire
30yr Clockmaker
Author of Clockworks.com
I just got a clock I’ve inherited however 4 of the chimes are broken. It’s the v pattern 4 & 8. The rod length is different on yours and I’m wondering if that will make any difference other than volume?
No difference, only the pitch of the sound
James Stoudenmire
30yr Clockmaker
Author of Clockworks.com
Does the chime rod come with any bolts/ hardware?
Yes it does
James Stoudenmire
30yr Clockmaker
Author of Clockworks.com
Does these chime rods work with the 1161-853 movement?
Yes it will work great with that movement
James Stoudenmire
30yr Clockmaker
Author of Clockworks.com
First time repairing a grandfather clock, have replaced the Movement and is working fine ” at this time,lol”. Need chime bar for a Howard Miller Triple chain Movement UW32045B – FB312. Thanks
We have only to offer the chime block complete with the rods
James Stoudenmire
30yr Clockmaker
Author of Clockworks.com
Just began to install the chime block that I ordered from you. There are two issues, and I’m trying to figure out how to solve them. First, the original block is V-shaped, 4 chimes for the strike and 8 for the chime. The longest rod on the old block is 19.5″. On the new one. the longest is 26″. I could still mount the new block in the clock but one of the rods interferes with the pendulum. If it were tilted back a bit (less than 0.25″), it wouldn’t be a problem. Is there a safe way to bend the rod a bit?
See this link of a similar situation for options
https://www.clockworks.com/posts/451-1151-high-bridge-suspension-post-length-issue
James Stoudenmire
30yr Clockmaker
Author of Clockworks.com
I have 8 rods at 27 inches. That one pic 10A looks just like mine. How do I add that to the cart
1. Select the chime block wanted in the options list
2. Click BUY NOW
James Stoudenmire
30yr Clockmaker
Author of Clockworks.com
I want to buy chime rod, but I don’t know it exactly correct the parts. If it doesn’t correct or fit? Can I return it?
Returns:
For orders over 20.00 that need to be returned or exchanged please make sure you send it with a note. Sometimes we get things back with no note, and we do not know what to do with it, so please be sure to include a note with your contact information, invoice number and what products you would like for an exchange or if you want a refund. You do not need an RMA number.
Any items that are returned for credit valued over $20 will incur a 15% restocking fee.
Exchanges will incur a reshipping charge. This will be submitted to the same form of payment.
No merchandise may be returned for credit or exchanged after 30 days.
There are no refunds on regeared mechanical clock movements, these custom jobs are for one customer and cant be resold.
There are no refund on shipping charges.
There are no returns or exchanges for orders with product value under $20. Reason = Other retailers usually charge a small item fee of about 5.00 to 10.00, we do not do this. Instead we do not offer refunds or exchanges on orders valued 20.00 or less. We explain everything in detail within the product pages. The explicit instructions are there so that you can order the correct item. It is time consuming and very expensive to keep reshipping and swapping mini movements, keys, etc. Please be sure to read the instructions thoroughly before making any decisions on what to purchase. If you have any questions or concerns after reading the instructions thoroughly, please send an email to clockworks@clockworks.com and we will be more than happy to help you. We want you to order the correct thing the first time around and get your clock up and running!
Perfect thank you